Steps:
1. Find a picture you like from the Internet or create your own photo layout header with picture / text.
2. You will need to use some type of Imaging (photo) Software Program, like Paint for Windows, Adobe Photoshop; or Photoshop Elements for Apple iMAC, etc.
3. Size your Image for the 'Header' starting with 625 wide pixels allowing the program to auto size the height.
Note: After installing the Header Image, you may have to resize it to fit your Blog Layout.
4. Place the 'Image' you want to use on your Desktop.
5. Sign into your Blog.
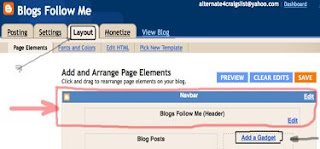
6. Select Layout.
7. Select Edit 'Header' right above Add a Gadget.
See Picture Below:

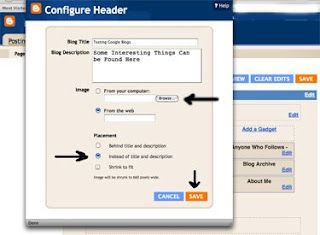
This is the pop-up window you should have.
Select 'Browse' and your image should be on your Desktop.
Next, There are several options to create this 'Header.'
I recommend the second option, 'Instead of Title and Description' but this is a personal choice.
Finally don't forget to 'Save.'
When doing your 'Header' layout you will have to experiment to see what fits and looks best for your particular Blog.
Remember - Make sure your 'Header' is not too large. It is a photo element (picture image) and they can delay your Blog loading frustrating visitors and driving them away.
See Picture Below:

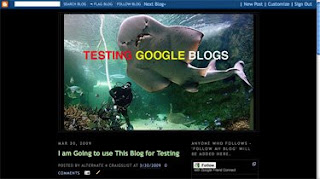
This is what my TEST 'Header' Gadget looks like.
I made this in about five minutes using Adobe Photoshop Elements on an Apple iMAC Computer.
I had to test the picture size several times to get the exact dimension.
Important: Depending on what Google Layout you select, the size may vary.
This picture is 625 Pixels Wide by 383 Pixels High.
I simply grabbed a picture from the Internet using Google Images, and placed some simple text in three different colors over the picture.
See Picture Below:

May all your Blogging be happy.
More Google Blogging Tips on Gadgets coming.


No comments:
Post a Comment