Originally on Tip # 93, Adding a Rating System Gadget to Your Blog or Website.
Found at: http://blogsfollowme.blogspot.com/2009/12/google-blogging-tip-93-adding-rating.html
I suggested using Blogorator. For awhile this worked well. Then several people last week complained it failed to work and Blogorator lost their files. This also happened on my Blog, Blogs I am Following, and Blogorator failed to fix the issue after 5-days even though I notified them.
Note: It is important to remember that these 'Widgets' may not keep up with the latest technology by Blogs such as Google, Wordpress, etc. They are Third Party Program Designs.
Originally I selected this Rating System because it worked on both Blogs and Websites and rated the over all page (Blog or Site) versus the individual posting.
I am no longer endorsing Blogorator.
Website Users, Designers, Programmers, Administrators, and Blog Owners should avoid installing the Widget from Blogorator.
Click on the LINK:
Adding a Rating System to Your Blog
//// ~ \\\\
Before Starting please note that this Widget does not work on Websites / Web Pages.
If after registering the Widget and you are unable to go to 'Setting's to remove the 'Recommendations' remove the Widget from your Blog, sign-out and try installing the Widget later on.
//// ~ \\\\
Follow these step by step instructions.
Note - Pay close attention, don't miss any steps.
Open the following and leave open till finished:
- Your email account for your Blog.
- Open Outbrain Website.
- When Outbrain loads your Blog, leave that open as well.
Step # 1:
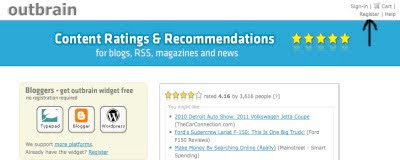
You are at the 'Outbrain' Homepage. In the upper right corner, click on 'Register.'
See Picture Below:
Step # 2:
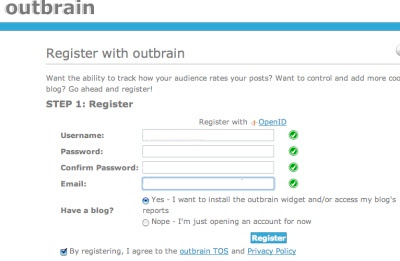
Once you click on register 'Outbrain' you will get a new window. Fill in the required information.
See Picture Below:
Step # 3:
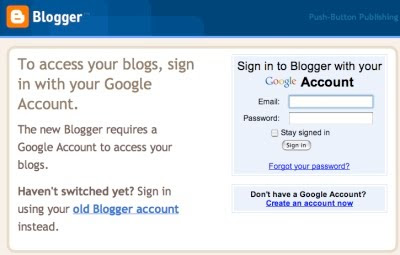
Sign-in to your Blog Account, shown here is Google...
See Picture Below:
Step # 4:
After signing into your Blog, you will see this....
See Picture Below:
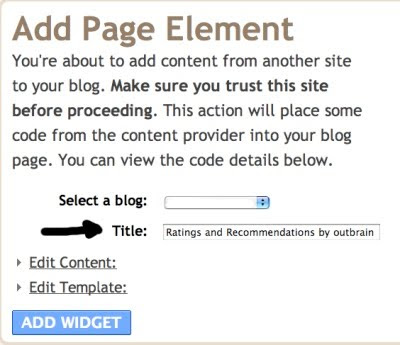
Step # 5:
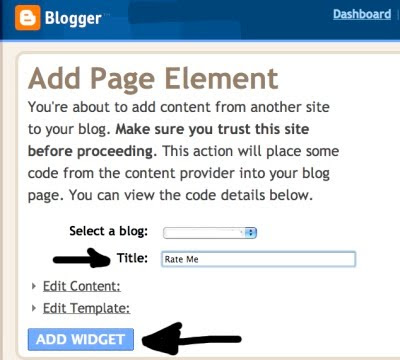
Here all I did was 'Change' the title, I recommend you do this, but it is not necessary.
Leave the other settings alone, just click on 'Add Widget.'
See Picture Below:
Step # 6:
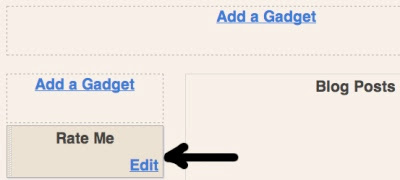
If you have a Google Blog (blogspot) 'Outbrain' set-up will take you to this location in Layouts. If you have a different type of Blog such as Wordpress it should take you to something similar. Just simply ignore this, and go to your Blog's main display page.
See Picture Below:
Step # 7:
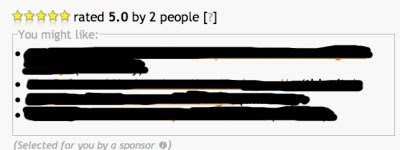
Initial installation produces this. The following steps will remove all the links beneath your Blog Rating. If you want these here, Stop, do not proceed any further. I recommend, you not have these on your Blog Postings, and continue with the complete set-up of the 'Outbrain Rating System.'
Note: I have blacked out those that appeared on my Blog.
See Picture Below:
Step # 8:
Respond to Outbrain in your email and verify your 'outbrain' account....
See Picture Below:

Step # 9:
In this step you will see a message that looks like this...
See Picture Below:
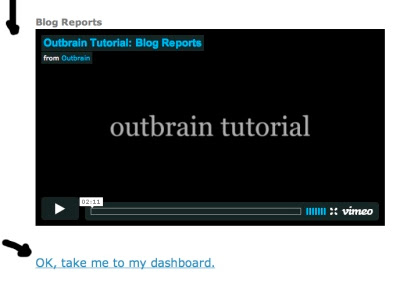
Step # 10:
In this step you should get a message that Outbrain has verified your email. Click on the setting, 'Manage Blogs', to the upper left to continue....
See Picture Below:
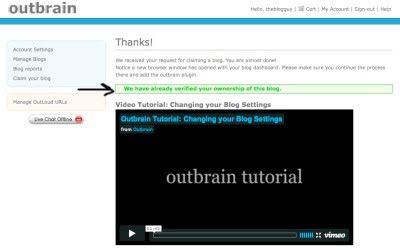
Step # 11:
In this step you should see your Blog's URL Address.
Next to the URL you should see, 'Settings' click on it.
See Picture Below:
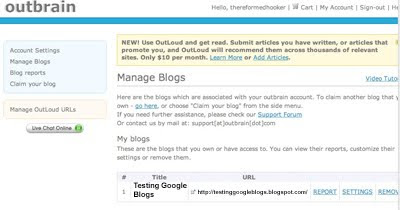
Step # 12:
Change the 'Settings' exactly as shown.
See Picture Below:
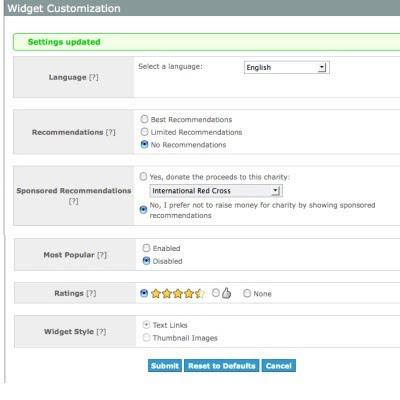
Step # 13:
When the Widget has been installed, and the setting changed, the 'Rating' should now look like this...
See Picture Below:
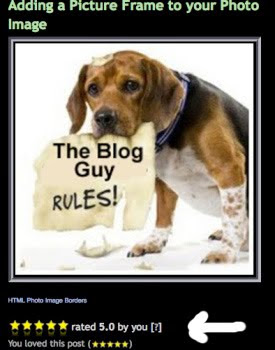
Step # 14:
After you have completed installing the widget go back to your email, and there should be an explanation of how the Rating System works, part will look like this...
See Picture Below:
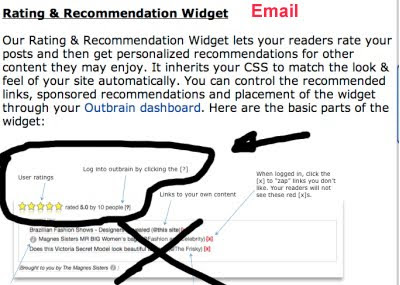
Step # 15:
Now sign out of-
Outbrain.
Your Blog.
Your Email Account.
View your Blog without signing in.
Test the Rating System.
Refresh your page, look and see if the rating worked on your Blog.
Step # 16:
To See this work on my Blog, Click on the LINK:
Testing Google Blogs
Step # 17:
If you have multiple Blogs under on email account, you can sign back into 'Outbrain' and select the ones that you want added to have a Rating applied. Remember, this Rating Widget (gadget) rates each individual Posting, not the entire Blog.
= = = = = = = =
Most Recent Google Blog Award Winner:
The Google Blog Award Winner for Week Ending (w/e) February 20, 2010, for the best Blog or Website was...
Click on the LINK below to see the Award Winner
Unique Car Productions
Don't forget to vote for your favorite Blog or Site for the Google Blog Award, you can vote for yourself. Voting closes every Saturday at 11:00pm Eastern Standard Time, USA.
Thanks for visiting Blogs Follow Me (blogsfollowme), prsented by: The Blog Guy.
Please support my efforts, Follow this Blog and I will Follow You.
As previously mentioned, I have created a FaceBook Page, here is the Link:
The Blog Guy's Facebook Page
I also created a Blog for my FaceBook Page Friends to get a Link by joining my page, here is the Link to my new Google Blog:
Blogs by Facebook
Coming next, Auto-Blogging
IMPORTANT: Many have ask me about Auto-Blogging.
This will be posted Tuesday, March 02, 2010.
