Showing posts with label Google FriendsConnect. Show all posts

1/18/10

Google Blogging Tip # 98: How to Create a Google Only Blog Profile

Q) Can you tell me how to create a Google 'Profile' without creating a Google Blog?

A) To create a Google 'Profile' simply follow the steps below.
The Google 'Profile' can be used for several reasons:
1) To reserve a name. The Blog can be added later.
2) So you can Follow someone who all ready has a Google Blog using Google Friends Connect.
Email Inquiries: 19

To create a Google only 'PROFILE' please follow these steps:

1/ - If you do not all ready have an email account create one. You will need an email address. If you don't have an email address or want a separate email just for your 'Google Profile' then Gmail or Yahoo are probably the best options but there are others such as myway; msn; live; and hotmail.

2/ - Write down the name you want to use for your Profile, example: blogsfollowme. I would recommend using this for the Blog Title as well.

3/ - Go to the following Google Link-
Create A Blog
See Picture Below:


4/ - The following window appears, see picture below:
Fill in all the required information.
When finished click on 'Continue.'


5/ - You will get another page. This is the page that you will create a 'Profile Only.'
Fill in the two required items, then click on 'skip this and create a blog later.'
See Picture Below:


6/ - This will take you to the final page.
If you want you can click on Edit Profile, Add a Profile Picture or just sign out.
Then open your email account. Google will have a confirmation email, click on it, sign back into your Profile, then sign out.
You are done.

How to use your PROFILE:
Anytime you wish to Follow someone, like me, The Blog Guy, just click on the 'follow' button just above 'Followers. Sign in with your email account and password and follow that Blog or Google Friends Connect on a website.
See Picture Below:


Most Recent Google Blog Award Winners:
The Google Blog Award Winner for Week Ending (w/e) January 16, 2010, for the best Blog or Website was...
Click on the LINK below to see the Award Winner
Uses for Duck Tape

The Google Blog Award Winner for Week Ending (w/e) January 09, 2010, for the best Blog or Website was...
Click on the LINK below to see the Award Winner
War Stories

Don't for get to vote for your favorite Blog / Site for the Google Blog Award, you can vote for yourself.


Thanks for visiting. Please Follow this Blog.
Coming soon, the next Posting Tip, Trick, Hint, HTML Codes, JavaScript, and Cool Fun Stuff.

12/1/09

Google Blogging Tip # 92: Adding a Social Community to Your Blog or Website

Q) Is there an alternate for Google Friends Connect that I can add to my Blog or Website?

A) I have added The BlogFrog as an additional social community to one of my Google Blogs. Try this as one option, it's easy to install and use. It seems to work well as a supplement to Google Friends Connect. You can have more than one Social Community Network on a Blog or Website.
Click on the LINK to start the installation of The BlogFrog:
The BlogFrog

When you go to The BlogFrog Website you get a page that looks like this.
Just select 'Sign Up.'


Once you click on 'Sign Up' this pop-up window appears. Here add a valid email address, your name (no spaces) - I used 'theblogguy', then create a password (write in down, you will need it later on).
Then just click 'Done.'


Next - you get a new pop-up window that looks like this.
At this Step, you ADD whatever Blog or Website URL Address you want BlogFrog to be installed on.
If you have Twitter and Facebook you can add them as well.
I chose only to use my Google blogspot address: http://blogsiamfollowing.blogspot.com/


Another new pop-up window appears....
When you get here, your almost done setting up BlogFrog. Just continue to the install.


At this step, you may want to use the default codes, you can change these later.
There are two ways to install BlogFrog, I chose the one on the left. I would copy and paste both codes into a word text file so you can opt out of one and replace it with another later if you would like.


Now Copy and Paste the code into your Blog or Website.
For Google Blogs, Follow these steps:
1. Sign-in to your Google Blog.
2. Go to 'Layout.'
3. Select 'Add a Gadget.'
4. Select 'HTML / JavaScript.'
5. Copy and Paste the BlogFrog Code.
6. Save, view your Blog. Then go back to Gadgets and move your BlogFrog Community to the desired location on your Blog sidebar.

For Websites, Copy and Paste the JavaScript Code from BlogFrog and place it where you want your new community to appear on your web page. This goes between the BODY and /BODY.


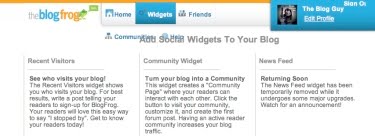
After you install BlogFrog, and move it to the desired location on your Blog sidebar or within your Website, this is how it will look. You can then invite others to join your community or they cam add you to theirs.


Here is an example of of how it should look on a Google Blog when you are done.
Look at the sidebar, at the bottom of my Blog, Blogs I am Following.
Click on the LINK:
Blogs I am Following

Sorry for the delay in posting this new Blogging / Website Tip.
I just got into Phoenix too late last night.

Next Blogging Tip, Trick, Hint, HTML Codes, JavaScript, and Cool Stuff will be posted on: Friday December 4, 2009.